Article: HOMEMADE BUBBLE CANDLES
HOMEMADE BUBBLE LIGHTS
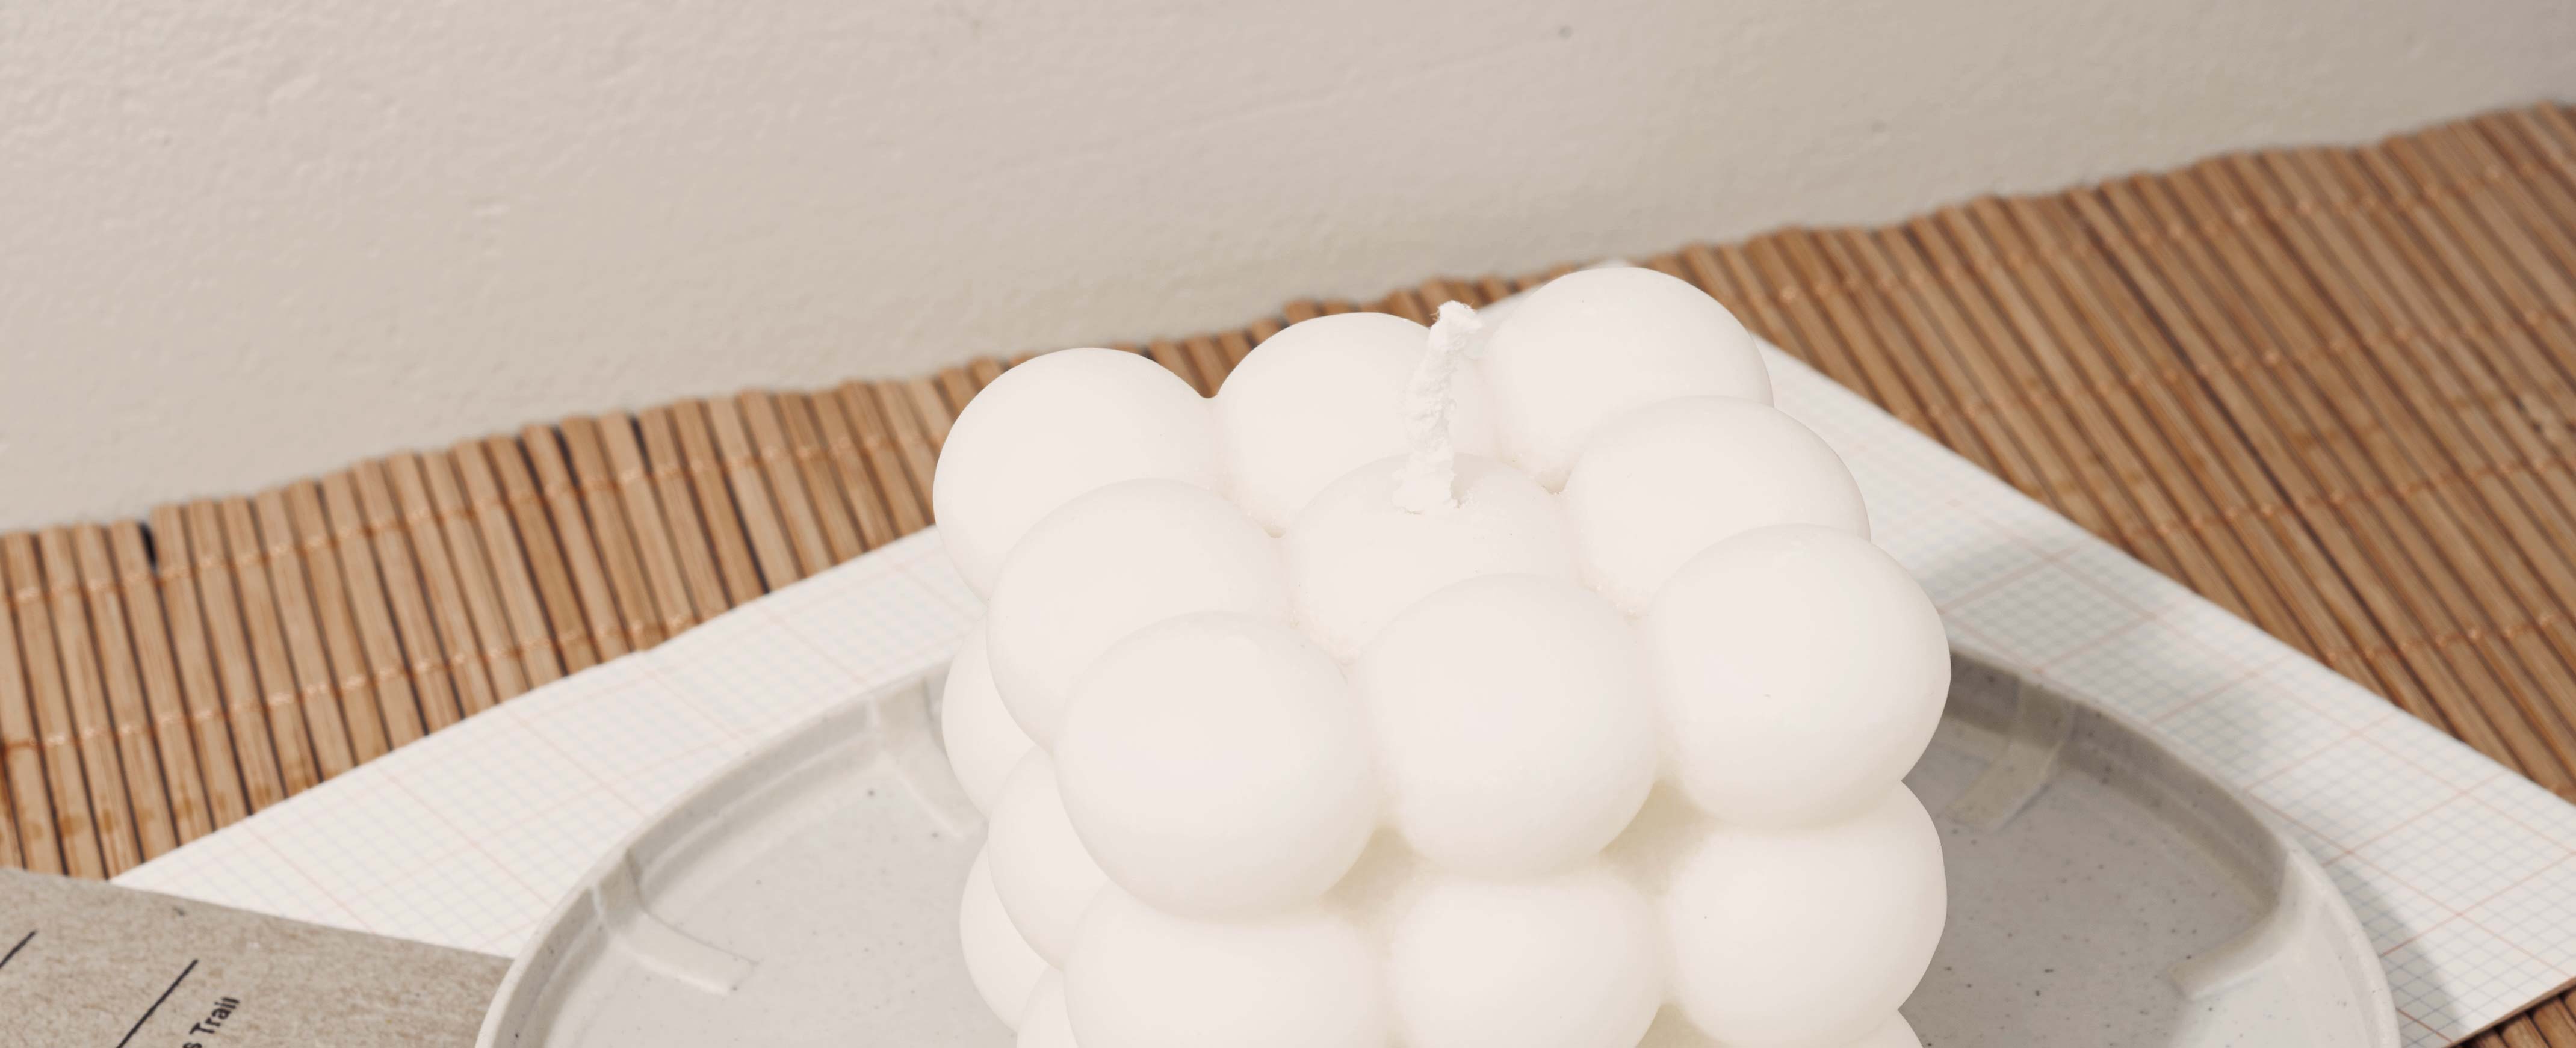
PASTEL-COLOURED BUBBLE LIGHT - STEP BY STEP
Although you don't need an excuse to engage in creative pursuits, the world situation is a good reason to give these popular lights a shot. We are developing a fragrance oil and needed a test product - make us the art after and put your own stamp on the pastel-colored bubbles.
Materials:
- Pot
- Water
- Bowl / glass for water bath
- Stearin
- Wick
- Stick to hold the wick in place
- Mould
Possibly:
- Color pigment
- Fragrance oil
TIP:
If you don't have candles in stock, you can buy a packet of candles, put them in a bag and smash them with a hammer. That way you get both candle and wick. We bought a pack of pure candles from IKEA for 59 crowns for 50 candles which makes about 18 bubble candles.
HOW TO DO IT:
01. PREPARE YOUR WATERBATH
Find a pot and fill it with 1/3 water - turn on the heat and bring the water to a boil while you prepare the remaining materials.
02. STEARINE + COLOURING PIGMENT
Filla bowl or heat-resistant glass with stearin and add colouring pigment to the mixture if necessary. If you do add pigment, don't be put off by the fact that before the mixture has hardened it looks a bit dark - it will harden lighter. That said, a little pigment goes a long way - be careful not to overdo it and add a little at a time.
03. LET THE MIX MEL over the water bath
Place your bowl or glass over or in the water bath and let it melt until there are no more solid lumps left - this takes time so while you wait just skip to point 04 below.
04. PREPARING THE MOULD
Pokea hole in the mould and pull the wick through - then tie the wick around a stick and pull so that the wick is tightened and thus held straight during the moulding process.
TIP:
If necessary, place your mould on a plate of flour or sugar and press the mould into place with your fingers - this will support the mould so that it does not become flat at the top when the stearin mixture is poured in.
05. HOLD THE STEARINE IN
Now that your mould is ready and your stearin is melted and free of lumps, you can either add fragrance oil or simply pour the stearin mixture into the mould. Stir if the colour is not quite even and pour in until the mould is completely full. Save a bit!
06. ADD MORE STEARIN
The stearine may well sink a little when it solidifies - forums don't get an even bottom, you just poke a hole in the solidified layer and fill up with more stearin.
07. COMPLETE
Let your light settle - shake it if necessary and listen for any liquid if you are not sure if the light is fully hardened. Arrow the shape of the light, cut the wick off the stick at the bottom and trim the wick at the top. If the light is a bit uneven, with a butter knife you can peel a bit of stearin off the bottom.
08. TURN ON &ENJOY!
The light is finished! Turn it on, enjoy it and make some more!
TIP:
The form can be purchased individually in several places on the web for less than 40 kroner - you can also buy a form with 6 so you can cast several candles at a time.
Enjoy (-: 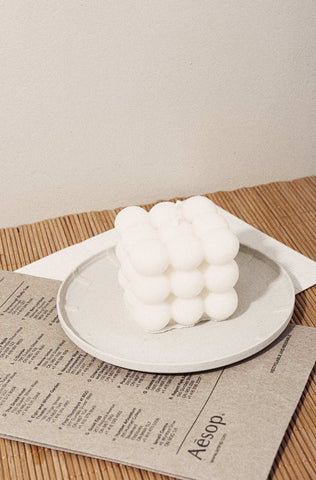

